
LinkedIn Insights Tag allows you to track user interactions with your LinkedIn ads and gather valuable data about the performance of your advertising campaigns. Implementing this tag through Google Tag Manager simplifies the process and gives you greater control over your tracking setup. In this step-by-step guide, we will walk you through the process of setting up the LinkedIn Insights Tag using Google Tag Manager.
Prerequisites
Before you begin, make sure you have the following:
- LinkedIn Advertising Account: You need to have a LinkedIn Advertising account with active advertising campaigns.
- Google Tag Manager Account: Create or have access to a Google Tag Manager account for your website.
- Access to Your Website: Ensure you have the necessary access and permissions to modify your website’s code through GTM.
Step 1: Access LinkedIn Campaign Manager
- Log in to your LinkedIn Ads account.
- Click on “Campaign Manager” in the top navigation menu.
Step 2: Create a New Conversion Tracking Tag
- In the LinkedIn Campaign Manager, click on “Analyze” in the top menu.
- Select “Insight Tag” from the dropdown menu.
- Click on the “Create Insight Tag” button
4. When the Insight Tag Agreement pop up appears, select “Agree & create”.
5. You’ll be given three options for how to install your Insight Tag, select the “I will use a tag manager” dropdown option.
6. Then select “Google tag manager”.
7. This will redirect you to LinkedIn’s guide for adding LinkedIn’s site wide Insight Tag to Google Tag Manager.
Step 3: Set Up LinkedIn Insights Tag in Google Tag Manager
Now, let’s integrate the LinkedIn Insights Tag into your website using Google Tag Manager:
- Log in to your Google Tag Manager account.
- Select the container where you want to implement the LinkedIn Insights Tag.
- Click on “Overview” in the left-hand sidebar.
- Click the “Add a new tag” to create a new tag.
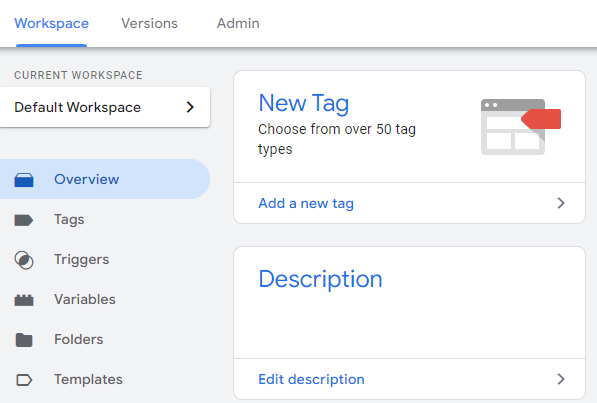
5. Name your tag something descriptive, like “LinkedIn Insights Tag”.
6. Click on the box that’s titled “Tag Configuration”.
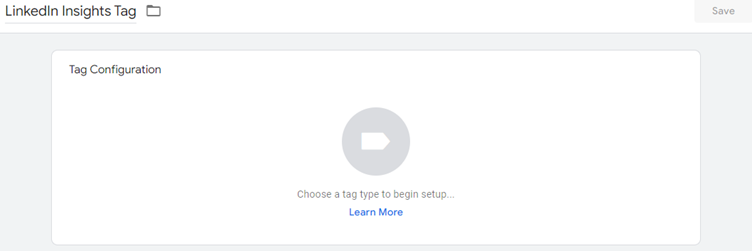
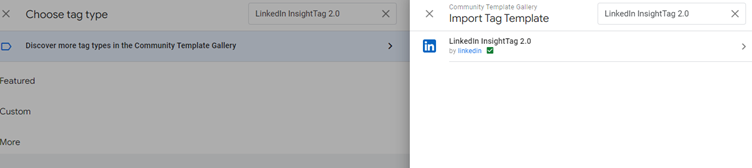
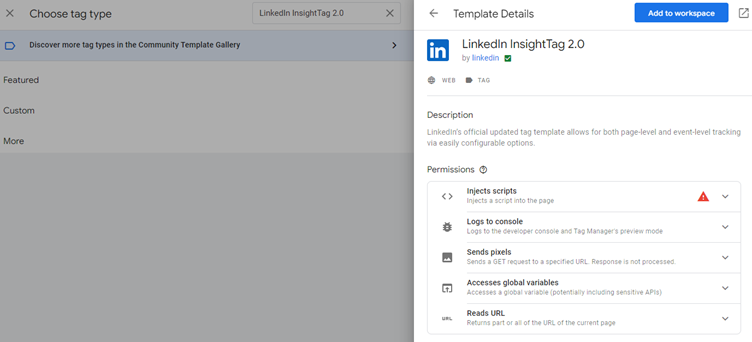
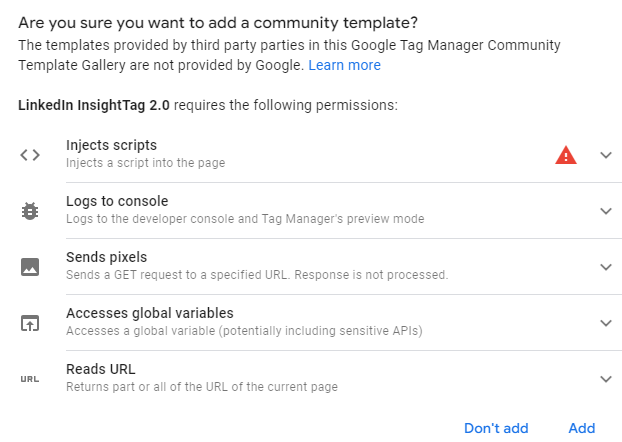
7. In the Tag Configuration section, click on “Tag Type” and choose ” LinkedIn InsightTag 2.0.” You may need to search under the “Discover more tag types in the Community Template Gallery” option and select the “Add to workspace” button.
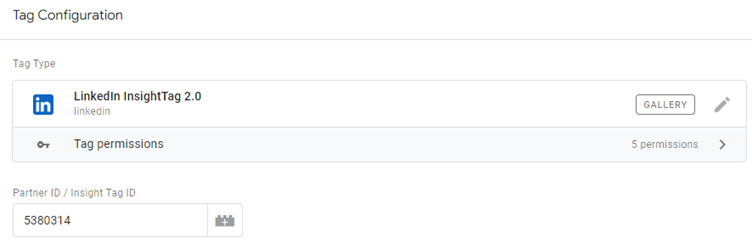
8. In the “Partner ID” field, paste the LinkedIn Insights Tag code reflecting on LinkedIn.

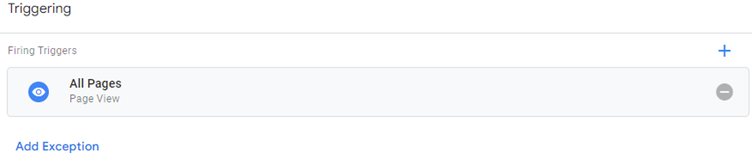
9. Set the “Trigger” for when you want the tag to fire. For tracking website traffic from your ads, select “All Pages Page Views”.
10. Click on “Save” to save the tag configuration.
You have now implemented basic page view tracking on your website.
Step 4: Test the Implementation
- In Google Tag Manager, click on “Tags” in the left-hand sidebar.
- Click the “Preview” button on the top right corner.
3. This will take you to Google Tag Assistant.
4. Type in your page URL and click the “Connect” button.
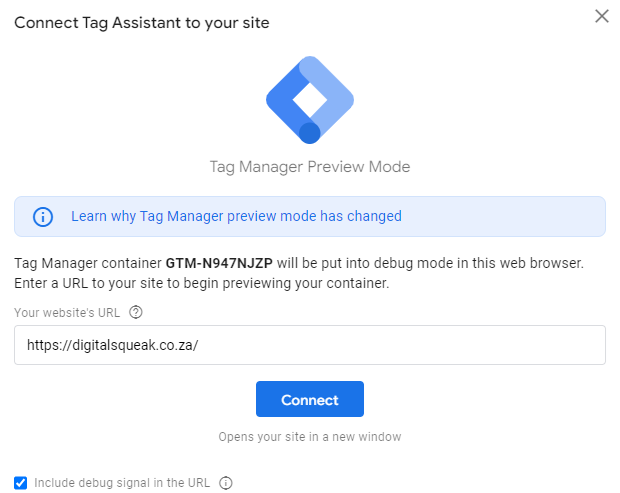
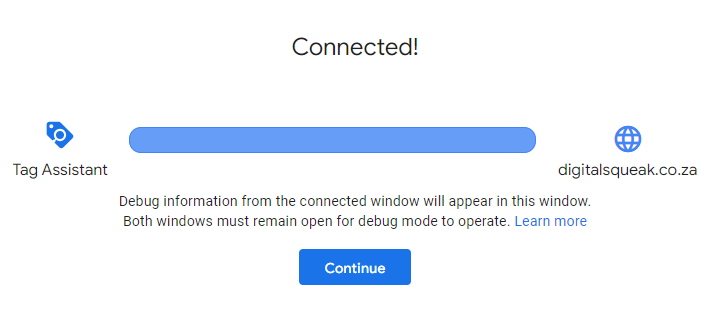
5. Once the popup in Google Tag Manager says “Connected” click the “Continue” button”.
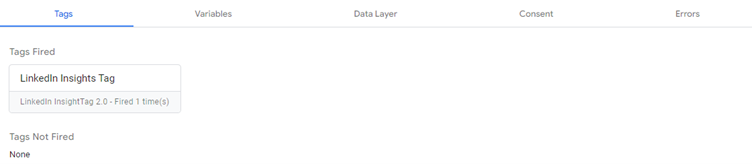
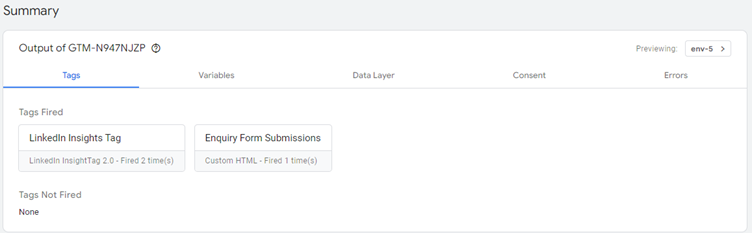
You should now see the insights tag under “Tags Fired”.
Step 5: Publish the Tag
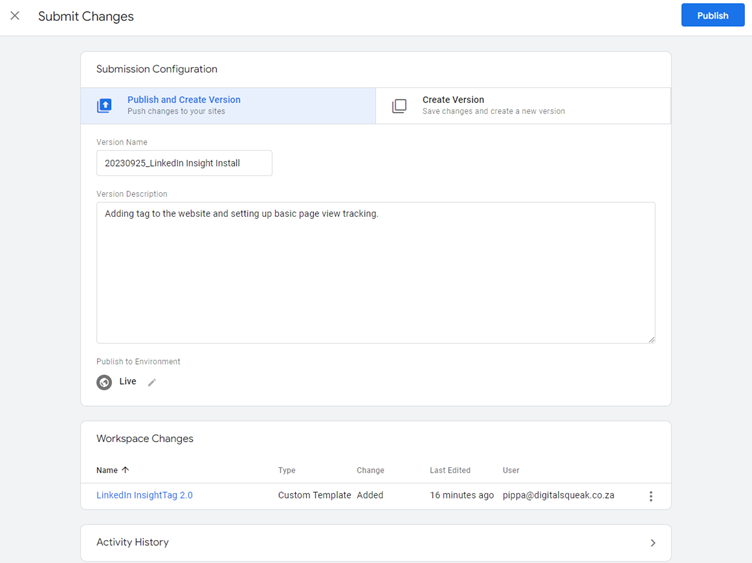
- After setting up the tag, click the “Submit” button in the upper-right corner of Google Tag Manager.
- Add a version name and description for reference, then click “Publish.”
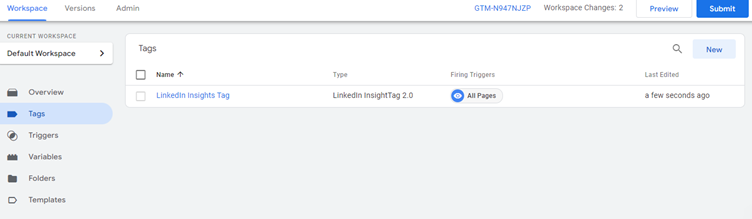
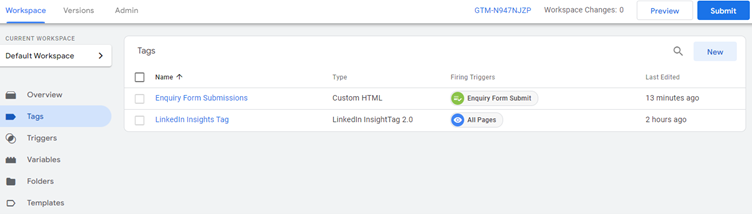
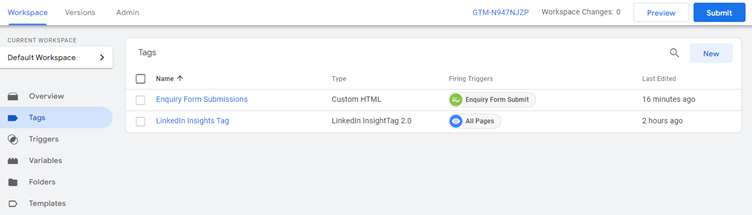
3. Once published, you should see your LinkedIn Insight Tag under tags in Google Tag Manager.
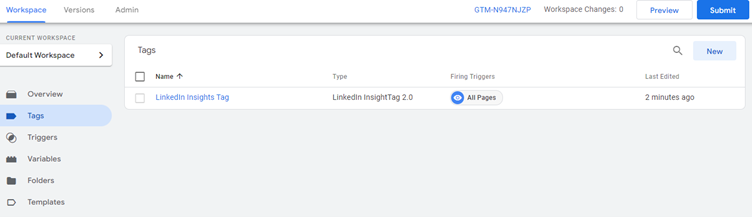
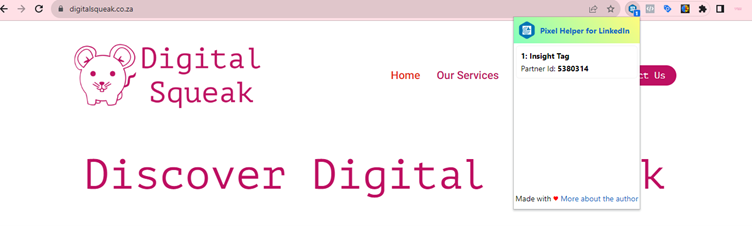
4. As a secondary measure, you can install Pixel Helper for LinkedIn on your Chrome Browser, and check if the pixel reflects on your website.
Step 6: Configure Your Conversion
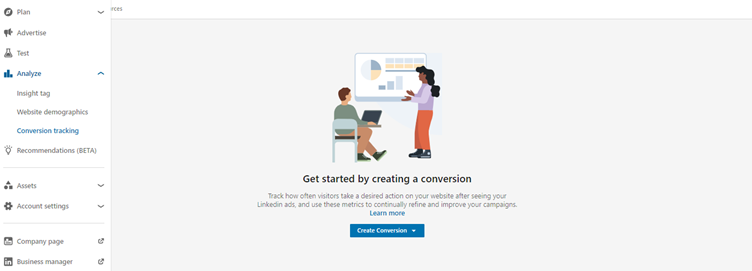
- LinkedIn Campaign Manager, click on “Analyze” in the top menu.
- Select “Conversion tracking” from the dropdown menu.
- Click on the “Create Conversion” button.
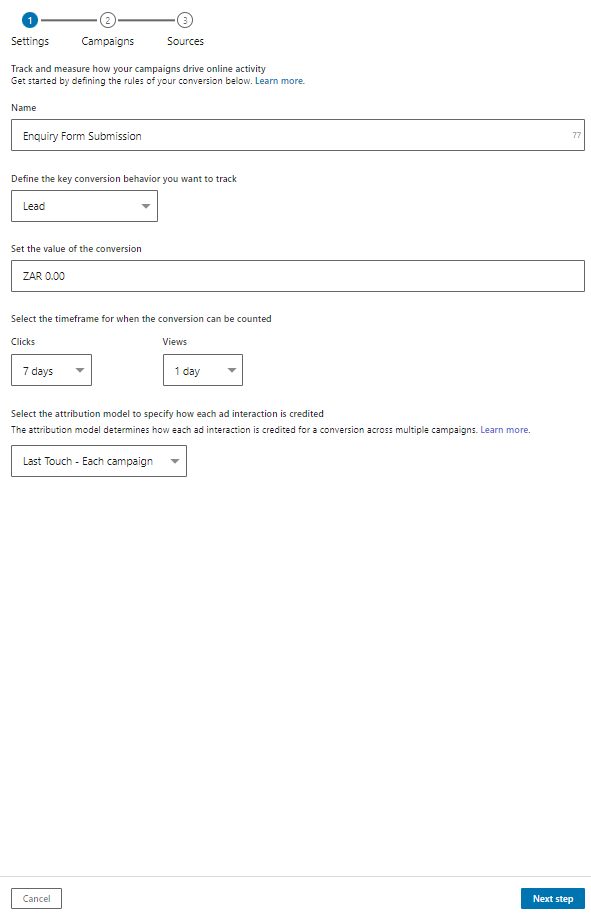
4. Give your conversion a name and select the appropriate category (e.g., ” Enquiry Form Submission”).
5. Configure the conversion settings according to your tracking needs.
6. Click the “Next step” button.
7. You can select the campaign you want to add the tracking to or skip this step if not campaigns are set up yet.
8. Click the “Next step” button.

9. Choose “Use a tag manager” as your conversion tracking method.
10. Select the “Event-specific” option.
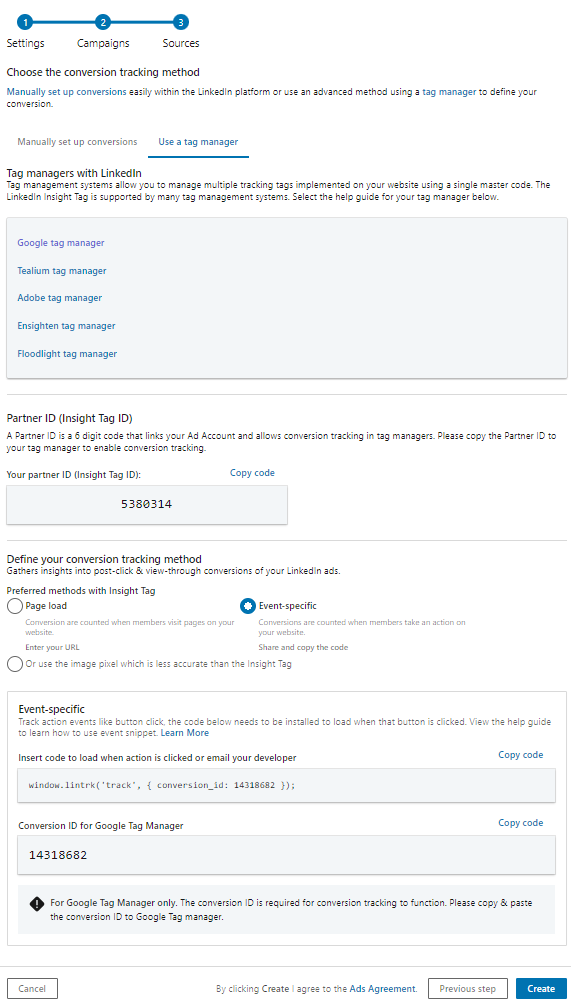
11. Under the “Insight Tag” section, you will find the LinkedIn Insights Tag code snippet. Copy this code to your clipboard.
12. Return to your Google Tag Manager, and set up a new tag, this time opting for a “Custom HTML” tag.
13. Be sure to wrap <script> … </script> tags around your code! If those tags are missing, your code will not execute properly.
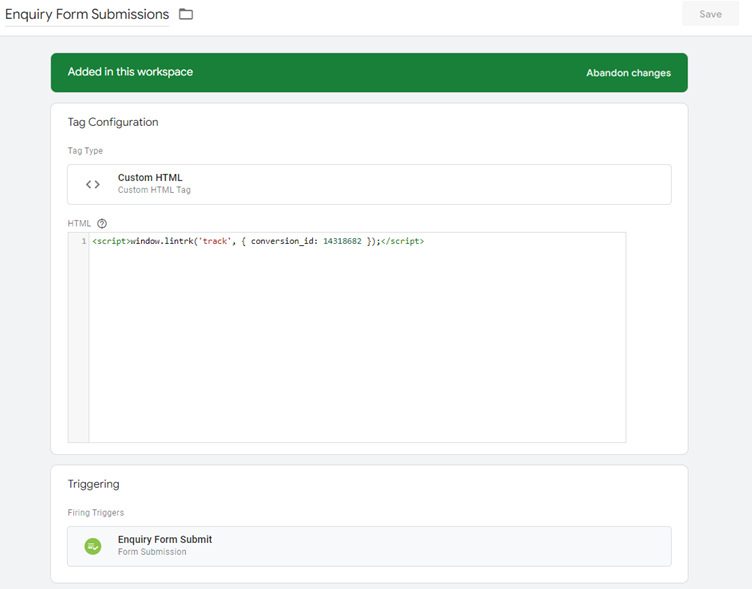
14. Then select the trigger event – in this example, we are triggering based on form submission, so select that. Google Tag Manager will give you the option to start this trigger on all form submissions, or only forms on specific pages. In this example, we are only going to trigger our Enquire Form conversion on a /contact page, because we may have other forms on other pages that we want to track differently.
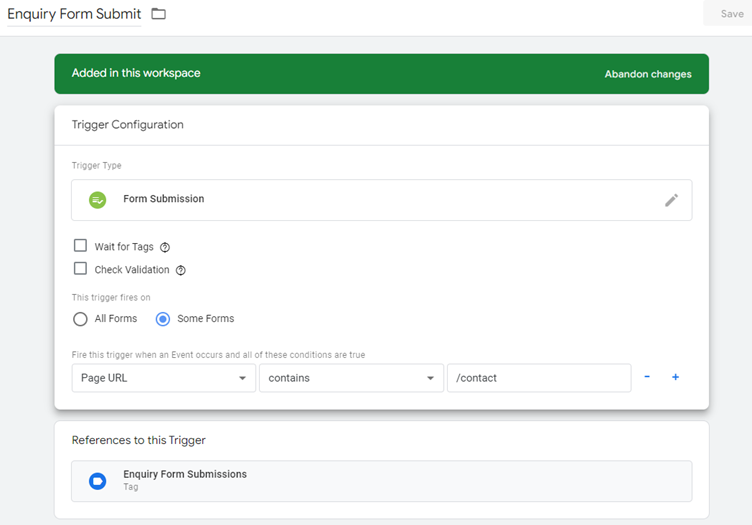
15. Click on “Save” to save the tag configuration.
Step 7: Test the Implementation
Before you consider your LinkedIn Insights Tag implementation complete, it’s essential to test it thoroughly.
- In Google Tag Manager, click on “Tags” in the left-hand sidebar.
- Click the “Preview” button on the top right corner.
3. This will take you to Google Tag Assistant.
4. Type in your page URL and click the “Connect” button.

5. Once the popup in Google Tag Manager says “Connected” click the “Continue” button”.

6. Complete the action on your website.
7. You should now see the custom event under “Tags Fired”.
Step 8: Publish the Tag
- After setting up the tag, click the “Submit” button in the upper-right corner of Google Tag Manager.
- Add a version name and description for reference, then click “Publish.”
- Once published, you should see your LinkedIn Insight Tag under tags in Google Tag Manager.
Step 9: In App Testing
- Open your website in a browser.
- Use the LinkedIn Ad you want to track and visit the relevant pages to trigger the tag.
- In Google Tag Manager, go to the “Preview” mode, and you should see your LinkedIn Insights Tag firing as you navigate your site.
- Check your LinkedIn Ads account to confirm that the tag is tracking conversions correctly.
Step 10: Monitor and Optimise Your LinkedIn Insights Tag
With the LinkedIn Insights Tag in place, you can now monitor your advertising campaigns’ performance and make data-driven optimisations to improve your ROI.
Congratulations! You’ve successfully implemented the LinkedIn Insights Tag using Google Tag Manager. This setup enables you to gather valuable data on your LinkedIn advertising efforts (including LinkedIn newsletters) and make informed decisions to enhance your marketing strategy.
If this seems a little more complicated than you’re up for, reach out to Digital Squeak so we can set up your LinkedIn tracking for you – pippa@digitalsqueak.co.za

Pippa is Digital Squeak’s Founder. In her hunt to balance her passion for digital marketing and her responsibilities as a single mom, she decided that the best solution was to start an agency that not only delivered exceptional service to clients, but provided the team with the freedom they needed to live their lives to the fullest.